
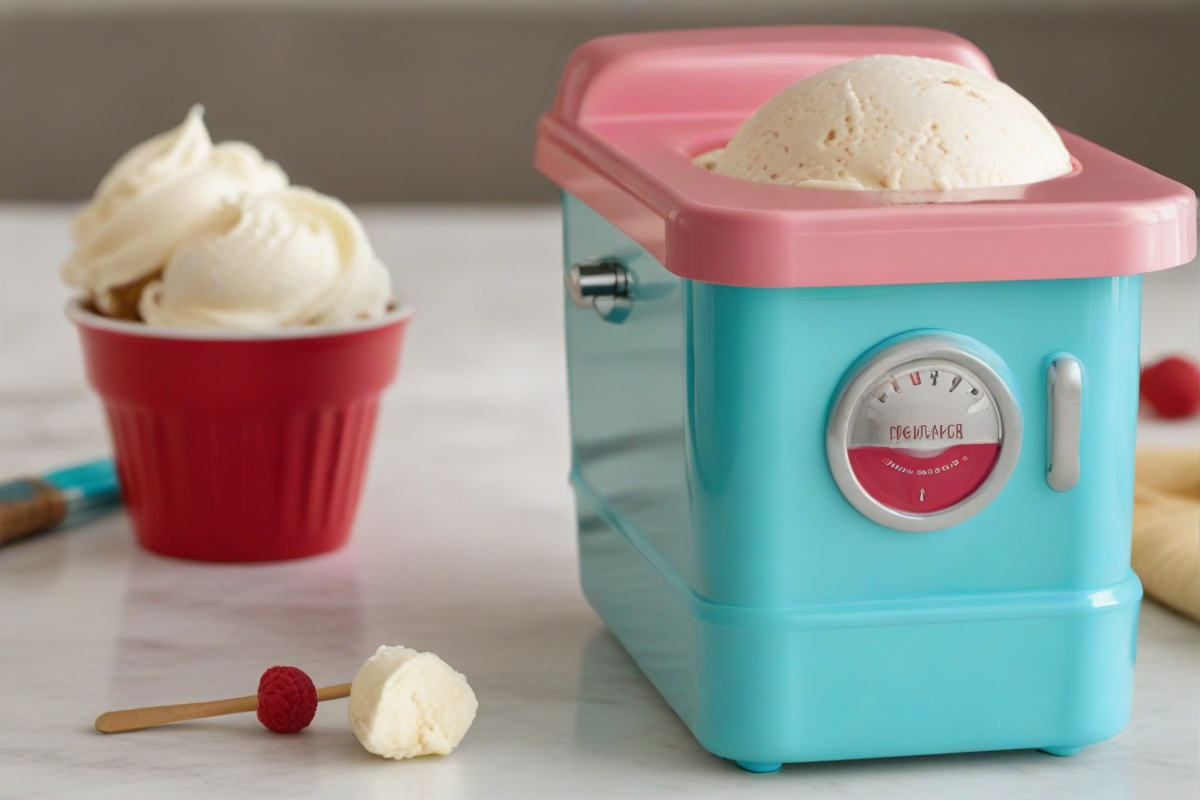
Introduction to Nostalgia Ice Cream Makers
Nostalgia ice cream maker recipes are perfect for those who love the classic charm and enjoyment of creating their own ice cream at home. These machines blend convenience with creativity, making it easy to whip up everything from traditional flavors to more inventive concoctions.
Benefits of Using a Nostalgia Ice Cream Maker
Easy to Use and User-Friendly
- Simple Controls: Nostalgia ice cream makers are designed for ease of use, allowing even beginners to start making ice cream immediately. The user-friendly interface ensures you can enjoy homemade ice cream without the complexities found in more advanced appliances.
Versatile and Customizable
- Experiment with Flavors: The ability to experiment is a significant advantage of using a Nostalgia Ice Cream Maker. Whether you’re in the mood for classic vanilla, rich chocolate, or exotic flavors like lavender honey, you have the freedom to create unique ice cream flavors at home.
- Diet-Friendly Options: Tailor your ice cream recipes to meet dietary needs, such as dairy-free, low sugar, or keto-friendly options, allowing everyone the chance to indulge without compromise.
Fun, Educational, and Culinary Creativity
- Engaging Family Activities: Making ice cream at home is not only fun but also educational, offering a great way for families to spend time together. It’s an excellent opportunity for kids to learn about cooking and to participate actively in the kitchen.
- Culinary Exploration: For those who love to cook, a Nostalgia Ice Cream Maker enables creative culinary experiments, pushing the boundaries beyond traditional ice cream flavors and techniques.
Cost-Effective and Reduces Waste
- Economical: Making your own ice cream can save money over time compared to buying premium brands at the store. By making ice cream at home, you can produce multiple batches from simple, basic ingredients, enjoying substantial savings.
- Waste Reduction: By making only the amount of ice cream you need, you help reduce food waste. This approach also allows you to use fresh ingredients that might otherwise go unused.
Quality Control and Nostalgic Experience
- Control Over Ingredients: Homemade ice cream made with a Nostalgia Ice Cream Maker ensures there are no added preservatives or unfamiliar additives—just fresh, quality ingredients.
- Reviving Fond Memories: There’s a nostalgic joy in watching ice cream churn and freeze, reminiscent of childhood summers or special family gatherings, enhancing the overall experience.
Getting Started with Your Nostalgia ice cream maker recipes
Nostalgia ice cream maker recipes : Getting started with your Nostalgia Ice Cream Maker is an exciting adventure into the world of homemade desserts. Here’s a simple guide to help you begin making delicious ice cream with ease:
1. Unbox and Assemble Your Ice Cream Maker
- Check the Contents: When you first open your Nostalgia Ice Cream Maker, ensure all parts are included according to the manual.
- Assembly: Follow the manufacturer’s instructions to assemble your ice cream maker. This typically involves attaching the paddle to the motor head and ensuring the mixing bowl is correctly placed.
2. Read the Instruction Manual
- Familiarize Yourself: Each model may have specific operational nuances, so it’s crucial to read the manual thoroughly. Understand the capacity, freezing requirements, and safety features to ensure optimal performance.
- Safety Precautions: Note any specific safety tips to prevent accidents, such as keeping the appliance dry and not operating it unattended.
3. Prepare the Ice Cream Bowl
- Freezing the Bowl: For most Nostalgia models, the ice cream bowl needs to be frozen before use. Place it in your freezer for the recommended time, usually between 4 to 24 hours, until it is completely frozen. This is critical for achieving the right ice cream texture.
4. Gather Ingredients
- Recipe Ingredients: Decide on your first recipe and gather all necessary ingredients. Basic recipes typically require cream, milk, sugar, and flavorings.
- Measuring Tools: Have measuring cups and spoons ready to ensure you add the correct amounts, as precision is key in ice cream making.
5. Mixing Your Ice Cream Base
- Combine Ingredients: In a mixing bowl, combine your ingredients according to your recipe. Use a whisk or a mixer to ensure the sugar is fully dissolved and the mixture is smooth.
- Chill the Base: If your recipe calls for it, you may need to chill the base in the refrigerator before churning. This helps improve the texture of the final product.
6. Churning the Ice Cream
- Start the Machine: Pour the chilled mixture into the frozen ice cream bowl, assemble the paddle and lid, and turn on the machine.
- Monitor the Process: Watch as the machine churns the mixture into ice cream. This process typically takes between 20 to 40 minutes.
- Consistency: Once the ice cream reaches a soft-serve consistency, it’s ready. If you prefer harder ice cream, transfer it to a container and freeze it for a few more hours.
7. Enjoy Your Creation
- Serve Immediately: Enjoy your homemade ice cream fresh out of the maker for the best flavor and texture.
- Store Properly: If there are leftovers, store them in an airtight container in the freezer. Proper storage helps maintain the quality and texture of the ice cream.
8. Cleaning and Maintenance
- Clean After Each Use: Ensure you clean your ice cream maker after each use. Follow the manufacturer’s guidelines for cleaning to keep the appliance in good condition.
- Storage: Store the ice cream maker in a cool, dry place until the next use.
With these steps, you’ll be well on your way to enjoying delicious, homemade ice cream with your Nostalgia Ice Cream Maker. Experiment with different flavors and add-ins to make each batch uniquely yours!
Classic Vanilla Ice Cream Recipe
Creating classic vanilla ice cream in your Nostalgia Ice Cream Maker is a simple process that results in a rich, creamy dessert. Here’s a straightforward recipe to help you make perfect vanilla ice cream every time:
Ingredients:
- 2 cups heavy cream: Provides the rich base for your ice cream.
- 1 cup whole milk: Adds creaminess without being too heavy.
- 3/4 cup granulated sugar: Sweetens the ice cream.
- 2 teaspoons pure vanilla extract: Gives the ice cream its classic vanilla flavor.
- Pinch of salt: Enhances the overall flavor.
Instructions:
- Mix Ingredients:
- In a large mixing bowl, combine the heavy cream, whole milk, granulated sugar, vanilla extract, and a pinch of salt.
- Whisk the mixture thoroughly until the sugar is completely dissolved. This step is crucial for a smooth texture in the finished product.
- Chill the Mixture:
- Before churning, cover the bowl with plastic wrap and refrigerate the mixture for at least 2 hours, or overnight. This helps the mixture cool thoroughly, which is essential for proper churning.
- Prepare the Ice Cream Maker:
- Ensure the ice cream bowl of your Nostalgia Ice Cream Maker is fully frozen. For best results, freeze the bowl for 24 hours prior to use.
- Churn the Ice Cream:
- Remove the chilled mixture from the refrigerator and pour it into the frozen ice cream bowl.
- Assemble the paddle and lid of your ice cream maker and turn it on.
- Let the machine run until the ice cream thickens and achieves a soft-serve consistency, typically about 20 to 30 minutes depending on the machine.
- Freeze to Firm:
- If you prefer a firmer consistency, transfer the soft-serve ice cream to an airtight container and freeze it for an additional 2-4 hours.
- Serve:
- Scoop and serve the ice cream as is, or top it with your favorite toppings like chocolate syrup, fresh berries, or sprinkles for an extra special treat.
- If the ice cream has been in the freezer for more than a few hours, let it sit at room temperature for a few minutes to soften slightly before scooping.
This classic vanilla ice cream recipe is a great foundation for many other flavors. Feel free to add mix-ins like chocolate chips, cookie pieces, or swirls of caramel or fruit puree after the ice cream has churned. Enjoy the process and the delicious results of your homemade creation!
Chocolate Ice Cream Recipe
Indulge in rich chocolate ice cream by following these instructions:
- Ingredients:
- 2 cups heavy cream
- 1 cup whole milk
- ¾ cup granulated sugar
- ½ cup unsweetened cocoa powder
- 1 teaspoon vanilla extract
- Directions:
- Whisk together cocoa powder and sugar in a large bowl.
- Add milk and whisk until the cocoa and sugar are dissolved.
- Stir in heavy cream and vanilla extract.
- Pour into your ice cream maker and churn according to the manufacturer’s directions.
- Freeze in a container until ready to serve.
For those seeking more exotic flavors, discover creative ice cream flavors you can make at home.
Fruit Flavors and Creative Variations for Nostalgia Ice Cream Maker
Strawberry Ice Cream with Nostalgia Ice Cream Maker
- Ingredients: Puree fresh strawberries to incorporate into your base. For every two cups of ice cream base, use one cup of pureed strawberries.
- Method: Mix the strawberry puree with the vanilla ice cream base before churning. Optionally, add a few drops of red food coloring for a vibrant appearance.
Tropical Mango Ice Cream
- Ingredients: Select ripe mangoes for their smooth, tropical flavor. Puree the mangoes and strain to remove fibers.
- Method: Combine the mango puree with the base mixture. Enhance the flavor with a splash of coconut milk for a richer tropical taste.
Blueberry Lemon Ice Cream
- Ingredients: Simmer blueberries with a touch of sugar and lemon zest until the berries start to burst. Allow the mixture to cool.
- Method: Gently fold the cooled blueberry mixture into the vanilla base after churning to create a beautifully marbled effect.
Creative Ice Cream Variations
Peach and Basil Delight
- Ingredients: Use fresh peaches for sweetness and fresh basil leaves for an aromatic twist.
- Method: Puree the peaches and finely chop the basil, then mix these into the ice cream base before churning.
Raspberry and Chocolate Chip Ice Cream
- Ingredients: Combine fresh or frozen raspberries with mini chocolate chips.
- Method: Introduce raspberries and chocolate chips into the base after partial churning to ensure even distribution without overly breaking the raspberries.
Honey Lavender Ice Cream
- Ingredients: Use high-quality honey and edible lavender flowers for a unique flavor combination.
- Method: Infuse the milk with lavender by heating gently, then cooling it before mixing with the rest of the base. Stir in honey before churning.
Tips for Incorporating Fruit into Nostalgia Ice Cream
- Use Ripe, Seasonal Fruit: Opt for fresh and ripe fruit for enhanced natural sweetness and flavor.
- Pre-treat the Fruit: Depending on the fruit, consider cooking it down to reduce moisture content or puree and strain it to avoid icy textures in your ice cream.
- Balance Sweetness: Since fruits add natural sweetness, adjust the sugar levels in your base accordingly. Always taste and tweak the base after adding the fruit.
Troubleshooting Tips for Nostalgia Ice Cream Maker Recipes
Resolving Soft Ice Cream Issues
- Ensure Proper Freezing of the Bowl: Confirm the freezer bowl is completely frozen before use, ideally kept in the freezer for at least 24 hours.
- Chill the Ice Cream Base: Refrigerate your ice cream mixture for at least 2 hours prior to churning to enhance the freezing process.
- Check Freezer Temperature: Adjust your freezer settings to ensure it’s sufficiently cold to properly freeze the ice cream.
Preventing Overly Hard Ice Cream
- Avoid Overchurning: Stop the machine once the ice cream reaches the consistency of soft serve to prevent it from becoming too hard.
- Add Alcohol: A small amount of alcohol (like vodka or flavored liqueurs) can prevent the ice cream from freezing too solid, as alcohol does not freeze at typical freezer temperatures.
Fixing Ice Cream That Isn’t Freezing
- Inspect the Machine: Ensure that your Nostalgia Ice Cream Maker is functioning correctly. Check that the paddle moves properly to churn the mixture effectively.
- Check the Seal and Assembly: Verify that the lid is tightly sealed and the bowl is correctly assembled as per the manufacturer’s instructions.
Addressing Ice Crystals in Ice Cream
- Avoid Temperature Fluctuations: Keep your freshly made ice cream at a consistent freezing temperature to prevent ice crystals from forming.
- Use a Creamier Base: Opt for a higher cream to milk ratio to reduce the formation of ice crystals.
Eliminating Grainy Textures in Ice Cream
- Dissolve Sugar Completely: Make sure that the sugar is fully dissolved in the mixture before chilling and churning to avoid a grainy texture.
- Monitor the Mixture’s Temperature: Ensure the ice cream base is not too warm before churning and is chilled adequately.
Enhancing Flavor and Consistency
- Adjust Flavorings: If the ice cream lacks flavor, consider increasing the amount of vanilla, fruit purees, or other flavorings. Always taste the mixture before churning.
- Experiment with Stabilizers: Adding a small amount of cornstarch, tapioca, or commercial ice cream stabilizers can help achieve a smoother texture.
Conclusion Nostalgia ice cream maker recipes
With a Nostalgia Ice Cream Maker, the possibilities are endless. From classic vanilla to inventive concoctions, these machines allow you to bring the ice cream parlor into your home. Embrace the creativity and enjoy the delicious rewards of your homemade ice cream.
Enjoy crafting your own frozen treats and exploring the limitless possibilities with your Nostalgia Ice Cream Maker!